【ESP-IDF】ESP-IDF在Ubuntu环境下通过CDC-ACM接口烧录报错的解决方法

环境版本
- OS: Ubuntu Dwsktop 20.04LTS
- IDF: ESP-IDF v4.4
- Chip: ESP32-S3
- Project: offical example code 'hello_world'
烧录方式
IDF环境搭建暂且不提,我尝试过两个工具(idf.py & esptool.py)来烧录都会报相同的错误。我通过一些关键行搜索,索引到了一些网页arduino-esp32 github issue / esptool github issue 但是并没有获得什么有用的解决办法(除去硬件改动)。
不采用硬件改动的原因:这个BPI-Leaf-S3板子在windows OS环境下可以直接烧录,但是在Ubuntu环境下才遇到无法烧录的问题。所以我更倾向于软件配置方面解决问题。
具体的错误log如下:
[100%] Built target hello_world.elf
[100%] Built target gen_project_binary
hello_world.bin binary size 0x2e090 bytes. Smallest app partition is 0x100000 bytes. 0xd1f70 bytes (82%) free.
[100%] Built target app_check_size
[100%] Built target app
esptool.py esp32s3 -p /dev/ttyACM0 -b 460800 --before=default_reset --after=hard_reset write_flash --flash_mode dio --flash_freq 80m --flash_size 8MB 0x0 bootloader/bootloader.bin 0x10000 hello_world.bin 0x8000 partition_table/partition-table.bin
esptool.py v3.2-dev
Serial port /dev/ttyACM0
Connecting....
Chip is ESP32-S3
Features: WiFi, BLE
Crystal is 40MHz
MAC: 7c:df:a1:e3:0d:ec
Uploading stub...
Running stub...
Stub running...
Changing baud rate to 460800
Changed.
Configuring flash size...
Flash will be erased from 0x00000000 to 0x00005fff...
Flash will be erased from 0x00010000 to 0x0003efff...
Flash will be erased from 0x00008000 to 0x00008fff...
Compressed 22224 bytes to 13809...
Writing at 0x00000000... (100 %)
Wrote 22224 bytes (13809 compressed) at 0x00000000 in 0.5 seconds (effective 347.7 kbit/s)...

A fatal error occurred: Packet content transfer stopped (received 25 bytes)
CMake Error at run_serial_tool.cmake:56 (message):
  /home/hulk/.espressif/python_env/idf4.4_py3.8_env/bin/python
  /home/hulk/esp/esp-idf/components/esptool_py/esptool/esptool.py --chip
  esp32s3 failed


make[3]: *** [CMakeFiles/flash.dir/build.make:57: CMakeFiles/flash] Error 1
make[2]: *** [CMakeFiles/Makefile2:2447: CMakeFiles/flash.dir/all] Error 2
make[1]: *** [CMakeFiles/Makefile2:2454: CMakeFiles/flash.dir/rule] Error 2
make: *** [Makefile:359: flash] Error 2
make failed with exit code 2
解决思路
详细查看idf.py flash调用的烧录API:esptool.py esp32s3 -p /dev/ttyACM0 -b 460800 --before=default_reset --after=hard_reset write_flash --flash_mode dio --flash_freq 80m --flash_size 8MB 0x0 bootloader/bootloader.bin 0x10000 hello_world.bin 0x8000 partition_table/partition-table.bin
我们可以看到上面的烧录命令,调用esptool.py,那么就来从头到尾查看一下给的参数。
esp32s3 #选择芯片
-p /dev/ttyACM0 #这是我指定的串口号
-b 460800 #这是idf默认的串口烧录速率
--before=default_reset #通过usb-uart芯片的流控信号在烧录前reset board
--after=hard_reset #通过usb-uart芯片的流控信号在烧录后reset board
write_flash #flash操作模式,写flash
--flash_mode dio #flash模式
--flash_freq 80m #flash速率
--flash_size 8MB #flash大小
0x0 bootloader/bootloader.bin 0x10000 hello_world.bin 0x8000 partition_table/partition-table.bin` #烧录位置以及文件路径通过分析详细的参数后,我最先想到是否会和--before=default_reset --after=hard_reset两个参数有关,然后我就回到idf.py menuconfig里面在serial flasher config修改这两项相关设置。但是build & flash 也并未成功。
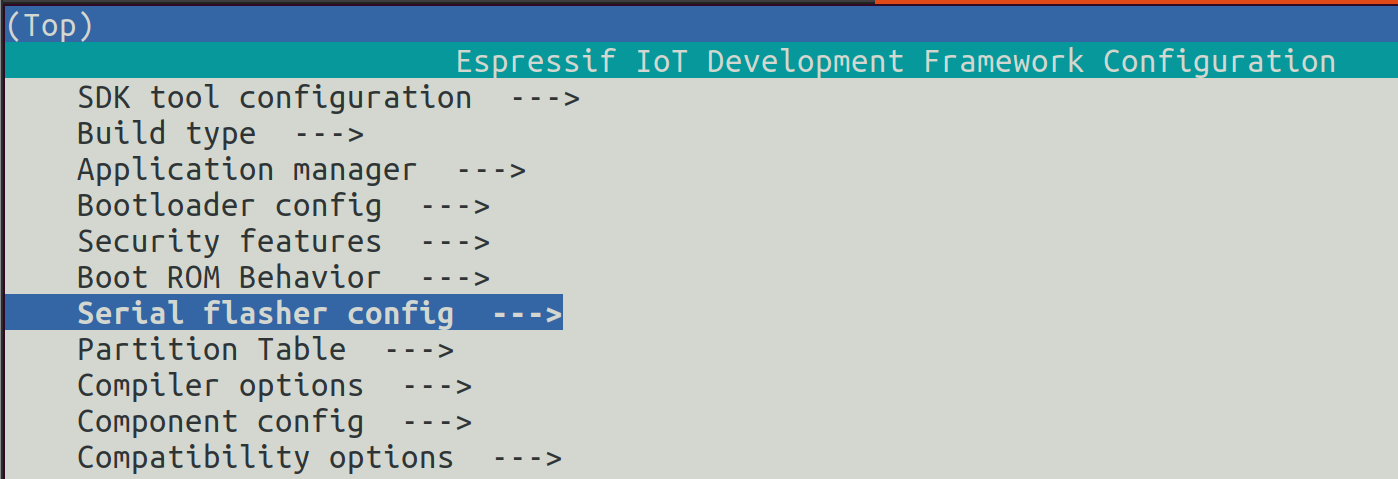
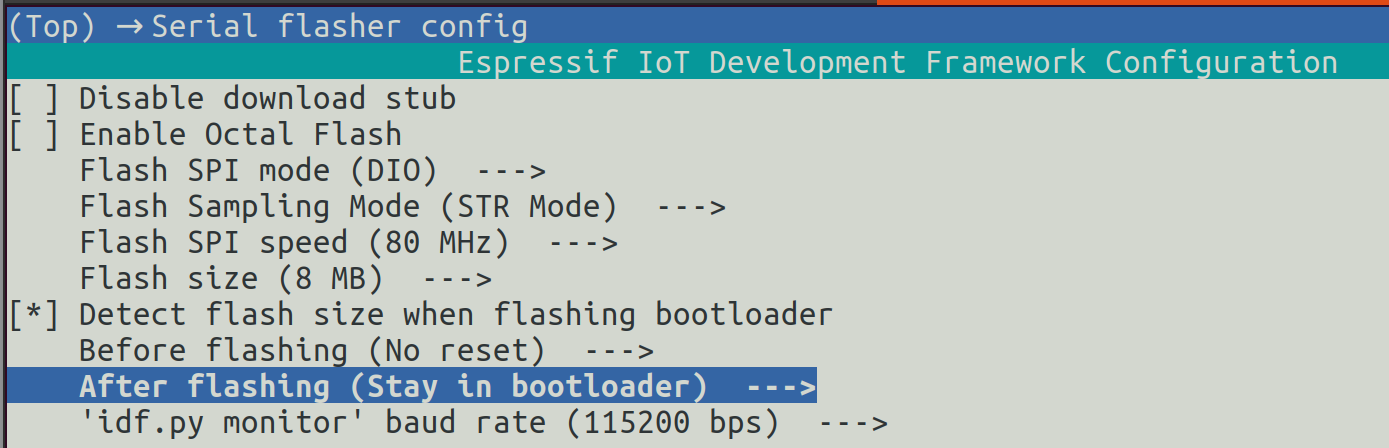
接下来,我又继续详细看serial flasher config里面,突然发现第一个脚就是Disable download stub禁用下载线脚,那这个就可以把esptool对uart芯片的流控功能disable,然后我就把其他选项复原,然后使能这个功能。

[100%] Built target app_check_size
[100%] Built target app
esptool.py esp32s3 -p /dev/ttyACM0 -b 460800 --before=default_reset --after=hard_reset --no-stub write_flash --flash_mode dio --flash_freq 80m --flash_size 8MB 0x0 bootloader/bootloader.bin 0x10000 hello_world.bin 0x8000 partition_table/partition-table.bin
esptool.py v3.2-dev
Serial port /dev/ttyACM0
Connecting...
Chip is ESP32-S3
Features: WiFi, BLE
Crystal is 40MHz
MAC: 7c:df:a1:e3:0d:ec
Changing baud rate to 460800
Changed.
Enabling default SPI flash mode...
Configuring flash size...
Flash will be erased from 0x00000000 to 0x00005fff...
Flash will be erased from 0x00010000 to 0x0003efff...
Flash will be erased from 0x00008000 to 0x00008fff...
Erasing flash...
Took 0.27s to erase flash block
Writing at 0x00000000... (4 %)
Writing at 0x00000400... (9 %)
..........
Writing at 0x0003d400... (98 %)
Writing at 0x0003d800... (98 %)
Writing at 0x0003dc00... (99 %)
Writing at 0x0003e000... (100 %)
Wrote 189440 bytes at 0x00010000 in 3.4 seconds (447.6 kbit/s)...
Hash of data verified.
Erasing flash...
Took 0.05s to erase flash block
Writing at 0x00008000... (33 %)
Writing at 0x00008400... (66 %)
Writing at 0x00008800... (100 %)
Wrote 3072 bytes at 0x00008000 in 0.0 seconds (492.5 kbit/s)...
Hash of data verified.

Leaving...
Hard resetting via RTS pin...
[100%] Built target flash
Done
这就可以成功烧录了,那就记住这个选项,在Ubuntu里面对工程的menuconfig选项要修改这里。
完结
解决方法:
idf.py menuconfig-->serial flasher config-->Disable download stub
2 条评论
遇到了同样的问题,使用同样的方法解决了,只是没搞清楚到底是什么原因导致的?
不清楚是否USBCDC在win和linux下的处理不同导致