CloudFlare配置Dynamic DNS(DDNS)获取动态IP

在您的网络仅有动态公网IP,那么如何在外部访问是一个问题,本文向您介绍通过CloduFlare(简称CF)的DDNS来绑定域名解析。
具体如何把域名转入CF的DNS解析,可以自行搜索,或者打开CF官网根据介绍一步一步操作。
本站很久前分享过he.net的DDNS方法,如需了解可以详细看一下下面的这篇文章.
CF上的准备工作
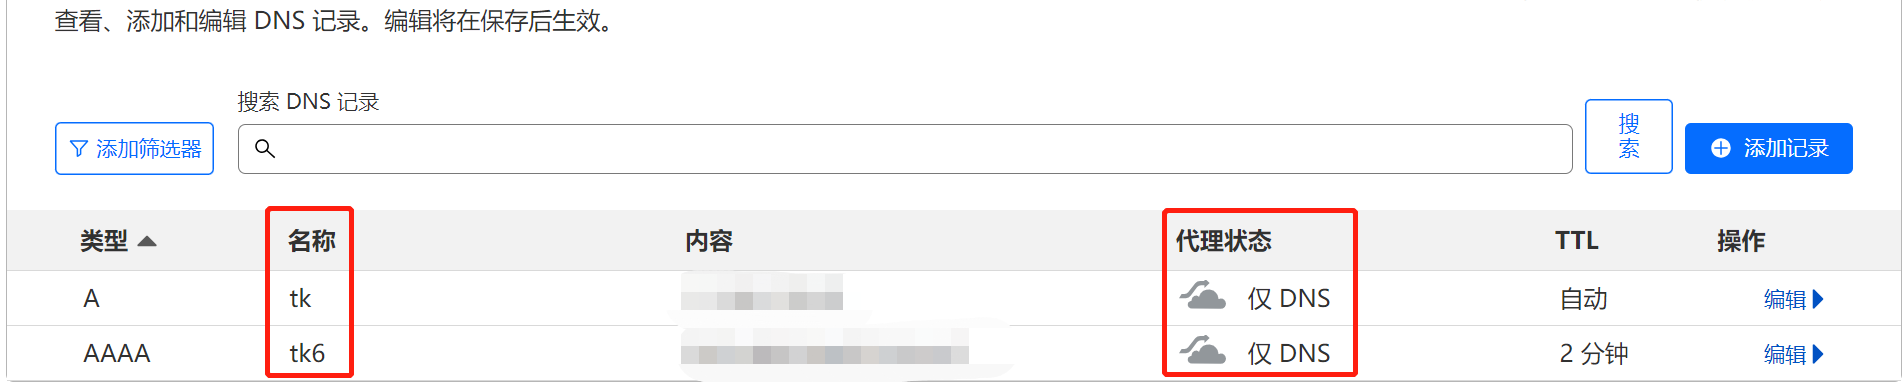
首先,需要在CF上添加一条解析记录,例如test.yelvlab.cn是要解析的域名,至于IP的话可以随意填写,后面会通过脚本自动更新。DDNS使用的域名不要开启CloudFlare的CDN,只用CF的DNS解析功能,也就是status一列对应域名的图标要是灰色的。
注意,解析类型:A记录是IPv4,AAAA是IPv6
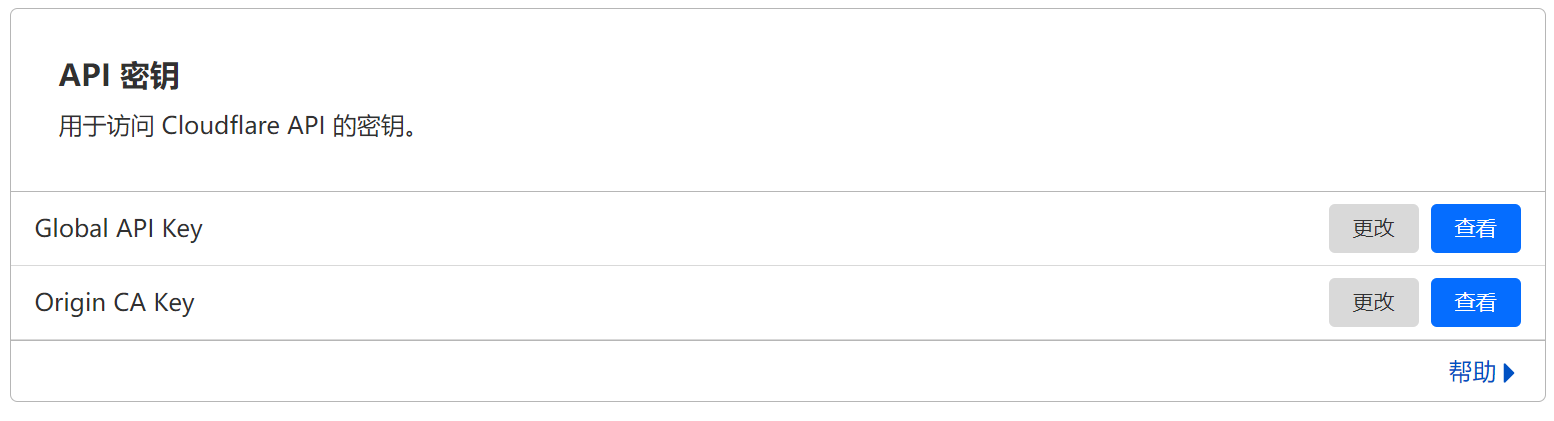
添加好域名解析后,去CF Profile里面拿到Global API Key(注意,千万不要外泄)。
SHELL脚本
获取脚本
下面这条命令是默认把脚本下载到你当前的操作目录,如果你要放在其他地方,可以修改命令或者进入到特定的目录。
curl https://raw.githubusercontent.com/lifehome/systemd-cfddns/master/src/cfupdater-v4 > ./cf-ddns-updater-v4.sh && chmod +x ./cf-ddns-updater-v4.sh修改个人信息
#!/bin/bash

# Forked from benkulbertis/cloudflare-update-record.sh
# CHANGE THESE

# Global API Key (Deprecated + Dangerous)
# Note: Please be caution as the Global API key can have unlimited access to **all** domain and features in your account.
auth_email="john.appleseed@example.org"            # The email used to login 'https://dash.cloudflare.com'
auth_key="f1nd7h47fuck1n6k3y1ncl0udfl4r3c0n50l3"   # Top right corner, "My profile" > "Global API Key"

# API Token (Recommended)
#####                                                                             #####
# WARNING: If you put any value inside the API Token variable,                        #
#            the script will automatically use the token and omit the Global API key, #
#            regardless if the Global API key is defined or not.                      #
#####                                                                             #####
auth_token="xxxx-xxxxxxxxxxxxxxxxxxxxxxxxxxxxxxxxxxx"

# Domain and DNS record for synchronization
zone_identifier="f1nd7h3fuck1n6z0n31d3n71f13r4l50" # Can be found in the "Overview" tab of your domain
record_name="dualstack.example.org" # Which record you want to be synced需要修改的部分只有开头的这部分,auth_email、auth_key、auth_token、zone_identifier和record_name。
auth_email: 输入你的CF登陆邮箱auth_key: 输入你的Profile>Global API KEYauth_token: 这个要留空,具体可以看脚本内描述zone_identifier: 这个在你的域名的概述页面的右下角可以找到record_name: 这里填写要解析的域名
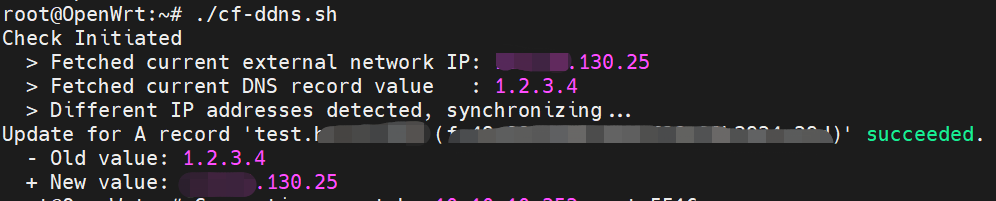
修改完保存退出,并在脚本的目录下执行:
./cf-ddns-updater-v4.sh执行结果如下则表示运行成功,并已经更新IP。
Crontab定时执行
脚本配置成功后,并且手动执行确认没问题了之后,就可以添加到crontab里面定时自动执行。crontab -e可以进入到编辑页面,并输入类似下面的命令,下面的命令表示每小时同步一次IP,还要注意修改你的脚本存放目录。
0 * * * * /root/cf-ddns-updater-v4.sh > /dev/null 2>&1参考
利用CloudFlare设置Dynamic DNS(DDNS)获取动态IP